GIS web services
Web Map Service / Web Coverage Service
A Web Map Service (WMS) is an Open Geospatial Consortium (OGC) standard that allows users to remotely access georeferenced map images via secure hypertext transfer protocol (HTTPS) requests.
DE Africa provides two types of maps services:
Web Map Service (WMS) – A standard protocol for serving georeferenced map images over the internet that are generated from a map server using data from a GIS database. It is important to note that with a WMS, you are essentially getting an image of geospatial data (i.e. JPG, GIF, PNG file). While this has its uses, it is an image only, and therefore does not contain any of the underlying geospatial data that was used to create the image.
Web Coverage Service (WCS) – A standard protocol for serving coverage data which returns data with its original semantics (instead of just pictures) which may be interpreted, extrapolated, etc., and not just portrayed. Essentially, a WCS can be thought of as the raw geospatial raster data behind an image. Using a WCS, you can pull the raw raster information you need to perform further analysis.
So, to give a quick summarisation, a WMS is simply an image of a map. You can almost think of this like taking a screenshot of Google Maps. A WCS is the raw raster data, so for example, if you are working with a WCS containing Landsat imagery, you can effectively chunk off the piece you are interested in and download the full multispectral image at the spatial resolution of the original image. The beauty of these services is that you can grab only the information you need. So, rather than retrieving a file that contains the data you are seeking and possibly much more, you can confine your download to only your area of interest, allowing you to get what you need and no more.
For more information, see this article on the difference between GIS web services.
The tutorials below cover setting up WMS and connecting to WCS.
Tutorial: Setting up WMS
This tutorial shows how to set up the Web Map Services in QGIS, and use it with other data on your computer such as drone imagery, vector or raster data. This may be useful for you if you cannot upload the data to the DE Africa Map or the DE Africa Sandbox due to uploading due to size or internet bandwidth. It may also be useful if you feel more comfortable doing analysis in a GIS application.
Although this tutorial focuses on QGIS, the same process can be used to connect other Desktop GIS applications. QGIS is a free and open-source desktop GIS application. You can download it from https://qgis.org/en/site/.
How to connect to WMS using QGIS
Launch QGIS.
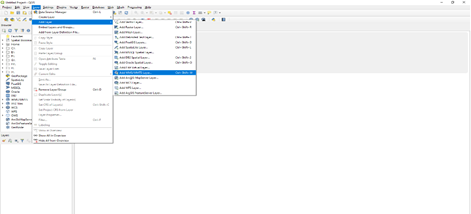
On the Menu Bar click on Layer.
A sub-menu tab will show below Layer; click on Add Layer, choose Add WMS/WMTS Layer.
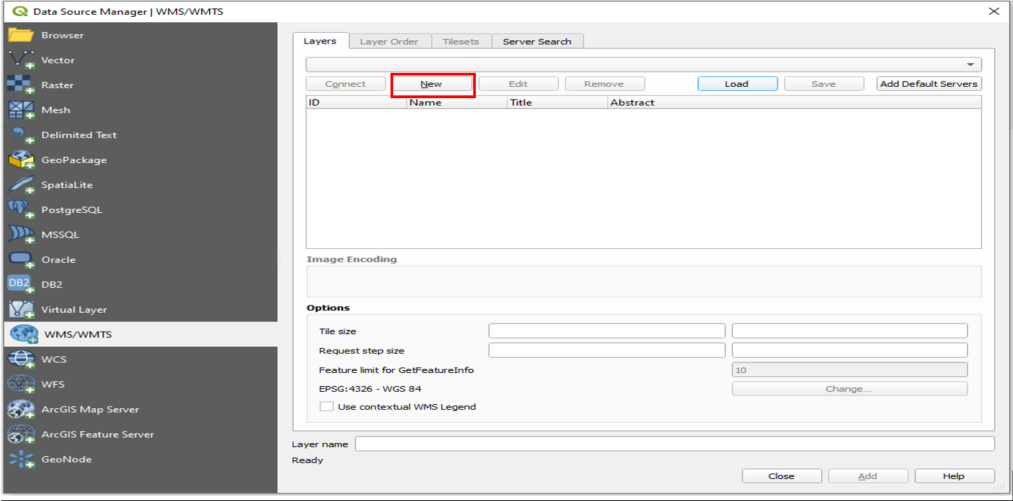
A dialogue will open as shown below. Click on the New button.
A dialogue will open, as shown below: Provide the following details, these can be found at the URL https://ows.digitalearth.africa/.
Name: DE Africa Services
URL: https://ows.digitalearth.africa/wms?version=1.3.0
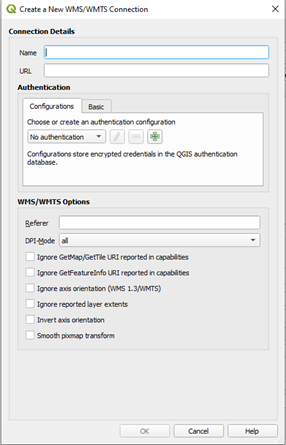
After providing the details above, click on OK.
The previous dialogue will show up, in the dropdown above the New button, you will see DE Africa Services. If it is not there click the dropdown button below and select it.
The Connect button will be activated, click on it to load the layers. Anytime this page is open, because the connection has already been established, click on Connect to load the data.
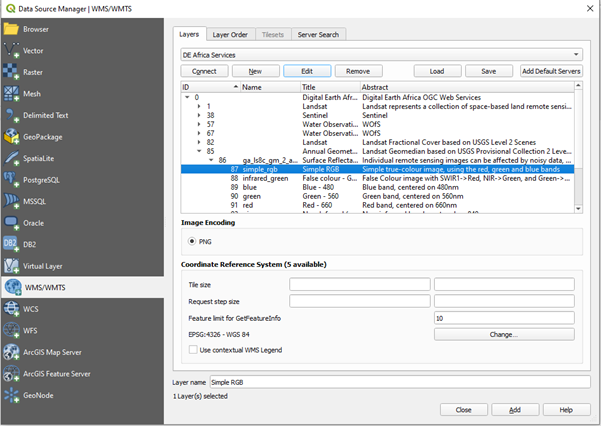
The layer will be loaded as shown below in the dialogue.
Navigate through layers and choose the layer you will need to display on the Map Page.
After selecting the layer, click on Add button at the bottom of the dialogue.
Close the dialogue, the selected layer will be loaded onto the Map Page.
For web developers
The sites below provide instructions on how to load these map services onto your platform.
https://leafletjs.com/examples/wms/wms.html
Tutorial: How to connect WCS
This tutorial shows how to create a Web Coverage Service connection using QGIS.
Launch QGIS.
On the Menu Bar click on Layer.
A sub-menu tab will show below Layer; click on Add Layer, choose Add WCS Layer.
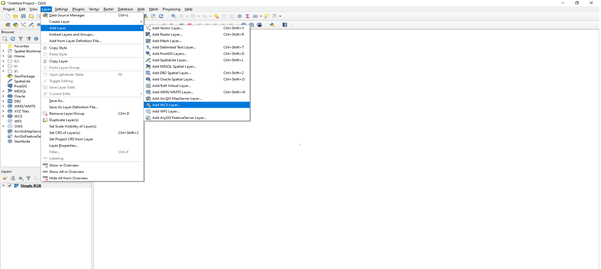
Click on the New button.
A dialogue will open, as shown below: Provide the following details, these can be found at the URL https://ows.digitalearth.africa/
Name: DE Africa Services
URL: https://ows.digitalearth.africa/wcs?version=2.1.0
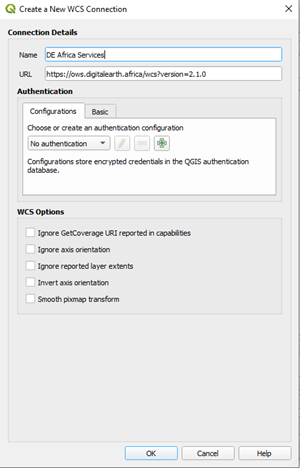
After providing the details above, click on OK.
The previous dialogue will show up, in the dropdown above the New button, you will see DE Africa Services, if it is not there click the dropdown button below and select it.
The Connect button will be activated, click on it to load the layers. Anytime this page is open, because the connection has already been established, click on the Connect button to load the data.
The layer will be loaded as shown below in the dialogue.
Navigate through layers and choose the layer you will need to display on the Map Page. With WCS you can select Time and Format of Image.
After selecting the layer click on the Add button at the bottom of the dialogue.